# Hey, Buddy! Let's assign the value 100 to the object a.
a <- 100Exercise 1
In this exercise you will get acquainted with R and RStudio. RStudio adds many convenience features to the base R that you obtained from http://r-project.org. Most of these features go beyond the scope of this course, but some of them will flatten the learning curve of R programming.
If you have any questions, feel free to ask me or the workgroup instructor.
OK. Let’s begin!
Working with R and RStudio
Open RStudio
The following window will appear. 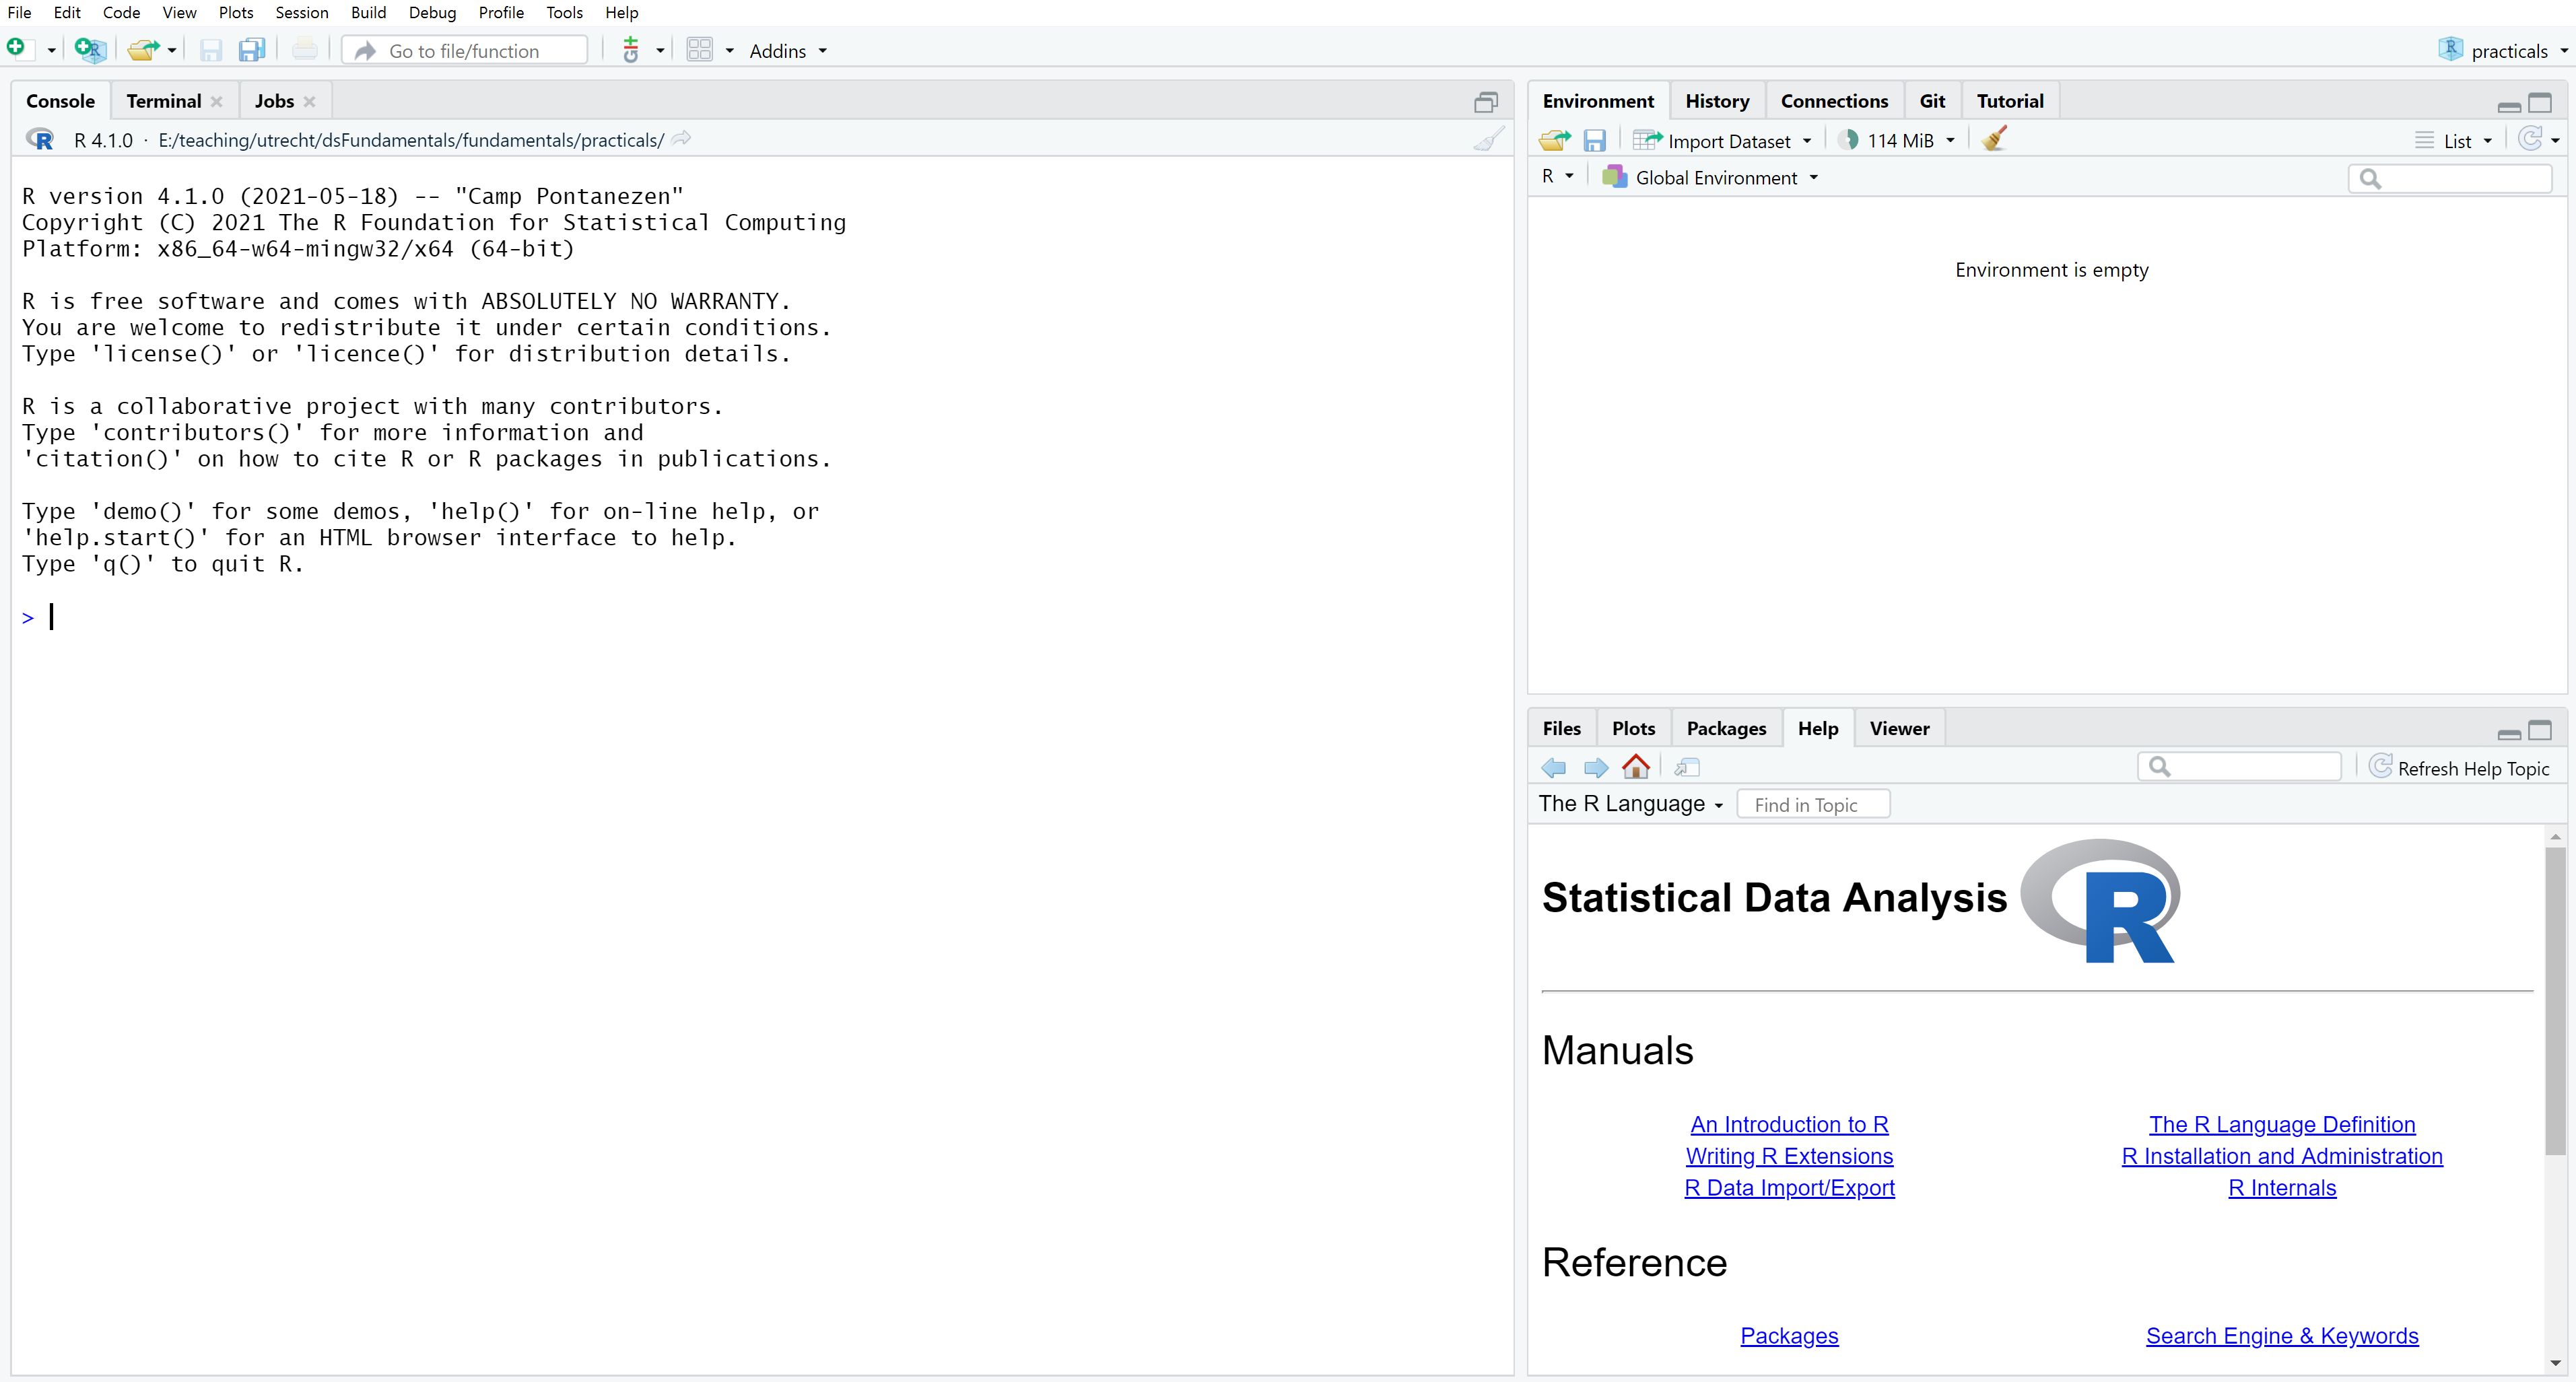
RStudio is divided into 3 panes: the console, the environment/history pane, and a pane wherein you can access your files, plots, help files, etc. You can rearrange the panes through RStudio’s preferences.
When we open an R script (i.e. a file that contains R code), a fourth pane will open to show the script.
Open a new R script
In the top left you will find this button:  . Click it and select “R Script”.
A new pane will open, and you can start writing code in this new script. Unless you’re just using R as a simple calculator, you should work with R scripts instead of writing your code directly in the console. Doing so has at least the following advantages.
- You will not lose your work, since all of the commands you execute are written in a script.
- You log your workflow. Code does not disappear over time, so you can always tell what analyses you did for a project.
- With access to your R script(s) and data, others can exactly reproduce your work.
- You coding will become more organized as you start trying to write more readable code. In the long run, this increased organization will make you a more efficient programmer. Remember: Efficient code runs faster!
Type the following into your new R script
The comment character, #, tells the R interpreter to ignore everything that follows in that specific line. Since nothing following a # will be interpreted as R code, you can use # to comment your code.
The line a <- 100 assigns the value 100 to the object a. When you run this line, a new object called a will be saved to your environment and given the value 100. The value 100 and the name a are completely arbitrary. You could just as well assign the value"bar" to the object foo, if you like.
Execute the commands in your script
Select both lines of code shown above, and execute them by pressing Ctrl-Enter or Ctrl-R (Windows/Linux) or Cmd-Enter (Mac)
After your code is executed the results appear in the console. If you type a in the console, R will return the assigned value. Try it. 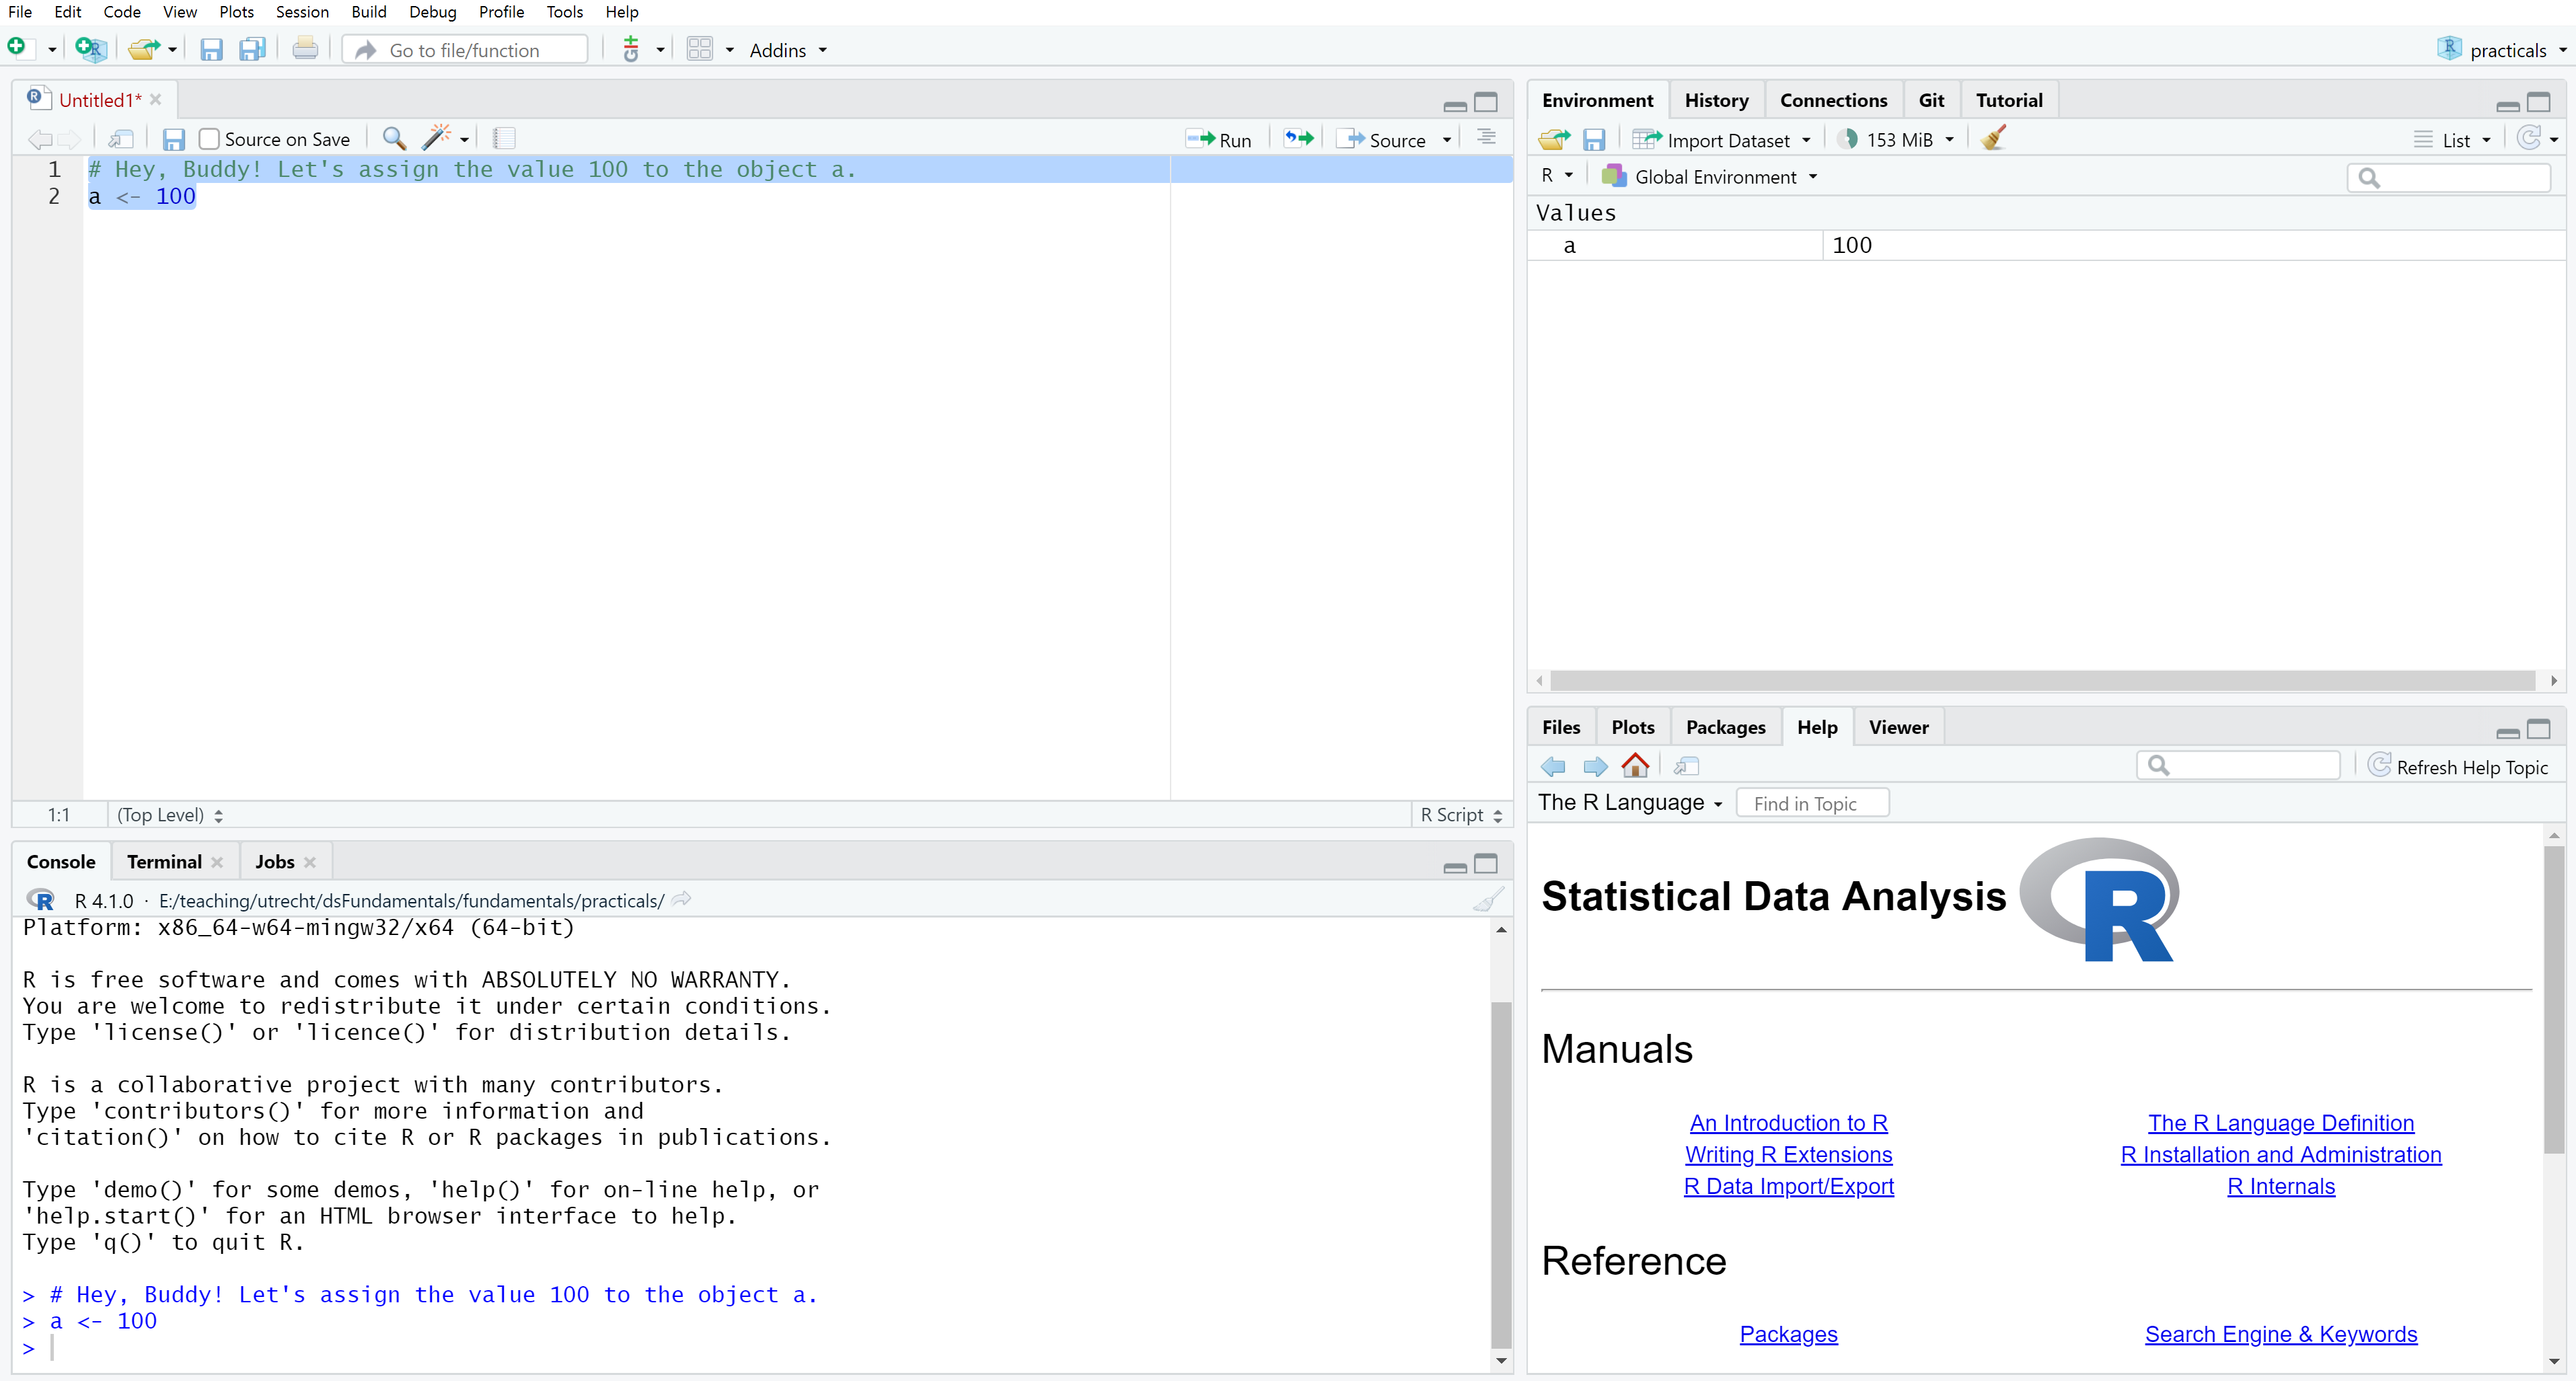
The shortcut Ctrl-Enter or Cmd-Enter is your friend: it runs the current selection, or—if nothing is selected—the current line. If pressing Ctrl-Enter or Cmd-Enter yields no result, you probably have the console pane selected. You can switch to the code pane by using the mouse to click on the desired line in the code pane or by pressing Ctrl-1 (Windows/Linux/Mac). You can select the console by pressing Ctrl-2 (Windows/Linux/Mac).
Save your code file as practical_1.R in a folder named practicals
You can use the standard Ctrl-s (Windows/Linux) or Cmd-s (Mac) or click on the  icon in the code pane. Your document is now saved. Saving your script in a separate folder will allow you to create an RStudio project for your practicals.
Close the practical_1.R script in the code pane
Even though you’ve closed the script, your code is still saved as a permanent code file.
Open the practical_1.R script
- Navigate to the practicals directory using the RStudio files pane.
- Click on the practical_1.R file in the files pane to re-open the script.
- Run both lines of code again.
- Inspect the contents of the global environment by executing the
ls()function.
You should see something like the following
ls()[1] "a"There is only one object in the environment, and it is called a. If you look at the environment pane, you can quickly see which objects currently exist in the environment (i.e., you don’t need to manually run ls()). You can also see some information about the objects.
RStudio Projects
Create a new RStudio project
- Click on the
 button in the top-right corner of RStudio.
 - Select “New Project”
- Click on “Existing Directory”
- Navigate to the folder where you just saved your code.
- Click on “Create Project”.
You will notice that the file practicals.Rproj appears in the files pane.
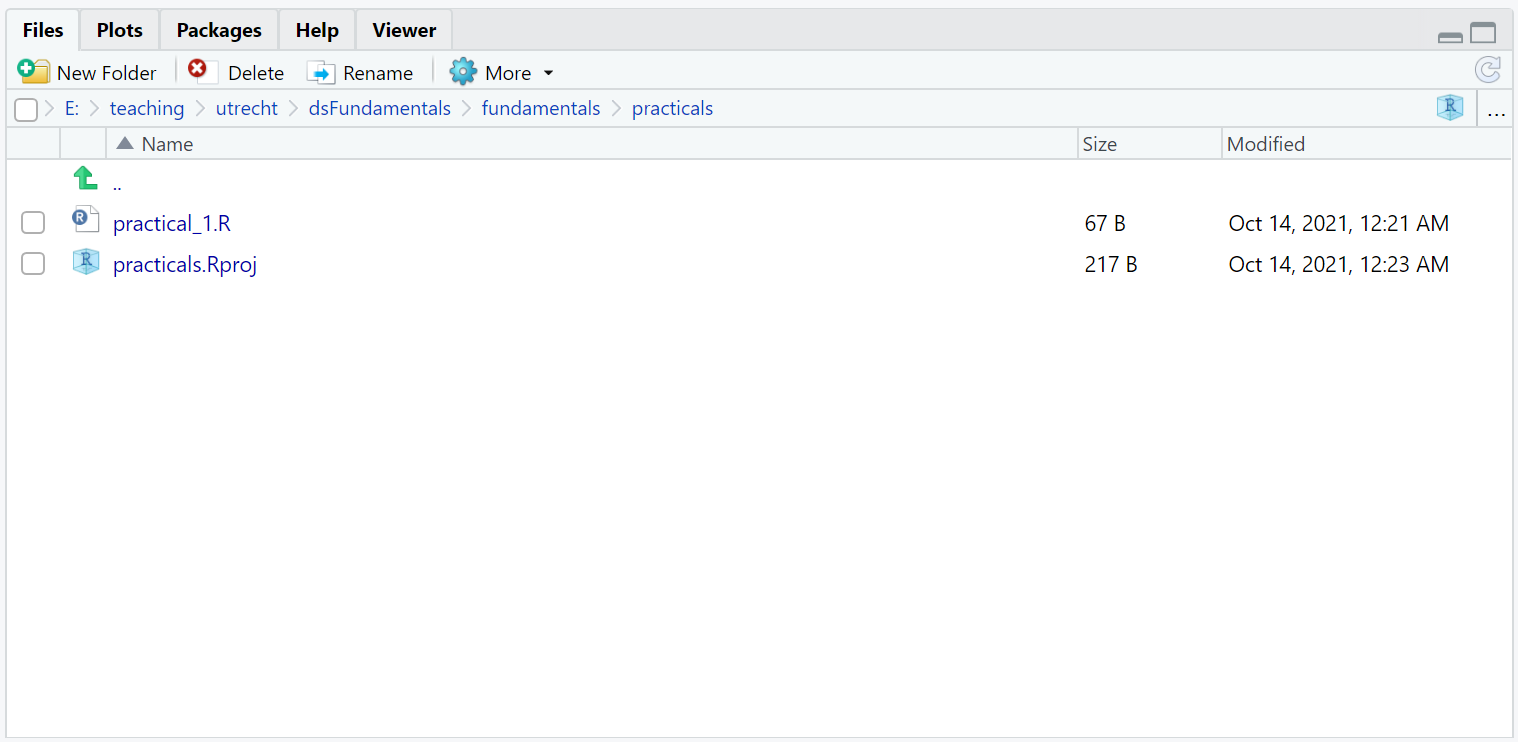
The possibility of categorizing your work into projects is one of the benefits of using RStudio. Within a project, everything is related to the .Rproj file. So, if you share the project with someone else, they only have to open the .Rproj file to access and run any code from the project.
RStudio Notebooks
Open the R script notebook.R
You can download a ZIP archive containing notebook.R here.
Have a look at the code in the script and make sure that you understand what it does.
Compile the script as an HTML file
Click on the  icon and select “HTML” as the output format.
The benefit of using HTML as an output format lies in the dimensional properties of a web-page. Especially when dealing with long code files, large output from analyses, or many figures, exporting your file as HTML is much more convenient than using paginated output formats (e.g., MS Word, PDF). With HTML output, you can simply scroll down or up to any part of the document, instead of flipping through pages back and forth to compare code, graphs, or output.
Inspect the HTML file you have created
The notebook feature in RStudio is very convenient; it runs any R code and converts the results into a readable file where code and output are both visible. There is, however, an even better format for integrating R code with text into a single document: markdown!
Markdown
About Quarto markdown
Quarto is a tool for creating documents that combine code, results, and narrative text in one file. Like Jupyter notebooks, Quarto markdown documents provide a cleaner, more professional, more reproducible way to publish analyses compared to plain code scripts.
Open the file markdown.qmd
You can download a ZIP archive containing markdown.qmd here
Have a look at the code in the markdown.qmd file and make sure that you understand what’s going on.
Compile the Quarto document into an HTML file
- Click the
 button to compile the file into an HTML document.
- If necessary, install the required packages.
- Inspect the HTML file and compare it to the one you created from the notebook.R file.
In the rest of this course, you will need to complete and submit exercises and assignments. The notebook functionality is a convenient way to quickly compile code and output into a quick-and-dirty report that you can discuss with others. The rmarkdown functionality in RStudio, on the other hand, is a well-polished production device to mark-up high quality documents where text and code/output are woven together.
- Please use Quarto markdown to prepare your work for this course, and submit both the
qmdand HTML files whenever you need to hand in exercises or assignments.
End of Exercise 1
—
Copyright Hanne Oberman, 2025 - CC BY-NC-SA 4.0
Materials developed by Amices team - Methodology & Statistics - Utrecht University